As I've mentioned here before, we opted to stay at home on Valentine's Day and celebrate quietly by making ourselves a scrumptious meal. I think I've also mentioned that a few months ago, we had a wonderful pizza at
West Crust Pizza here in town, and we decided to try something similar: a homemade pizza with honey-wheat crust, prosciutto, spinach, dates, and fancy cheeses. We chose asiago for the base and a bit of parmesan for a complement.
I found a recipe (
here) for a fairly simple honey-wheat crust on
allrecipes.com, but unfortunately did not take any photos throughout the process. It was, however, a pretty simple and relatively quick recipe. Here's what you need:
--1 (.25 oz.) package ative dry yeast {I used the rapid rise kind}
--1 cup warm water
--2 cups whole wheat flour
--1/4 cup wheat germ {honestly, I had no idea what wheat germ was or where it was located in my grocery store before Saturday. I'm still as clueless on the first point, although I now know it's used in some pizza dough recipes.}
--1 teaspoon salt
--1 tablespoon honey
1. Preheat oven to 350°F
2. In a small bowl, dissolve yeast in warm water. Let stand until creamy, about 10 minutes.
3. In a large bowl combine dry ingredients. Make a well in the middle and add honey and yest mixture. Stir well to combine. Cover and set in a warm place to rise for a few minutes. {I let mine sit for almost ten minutes.}
4. Roll or pat out dough on a floured pizza pan and poke some holes with a fork. {Make sure and pat the center a little further in, so that you have a raised outer edge like you're supposed to. I neglected this step and regretted it when all of the toppings on the outside wanted to roll off.}
5. Bake in preheated oven for 5 to 10 minutes, or until desired crispiness is achieved.
{Another note here: the recipe states that this amount of dough will make a thin crust, but that doubling the recipe will make a thicker pan-style crust, so I opted for the thick-crust route. I will know better next time; ours was over an inch thick, and was altogether too much bread for a pizza crust. I'm pretty sure that the original recipe amounts, given above, would have produced a perfectly suitable crust somewhere in between thin and crispy and deep dish.}
I didn't photograph the crust on its own before we added our toppings, but here's what we did next:
1. I brushed a thin layer of olive oil on top of the crust and then sprinkled on a little garlic powder.
2. We'd grated our asiago cheese, and we added that next, followed by prosciutto, then dried dates which we'd sliced up, then spinach last.
3. For an extra flavor, and also partially to cover up the spinach and keep it from getting quite so wilty, we added a sprinkling of freshly grated parmesan for the finishing touch. Here's what it looked like after all toppings had been added and before it went into the oven for the final baking.
4. Since the crust is already baked, you'll put it in the second time mostly just to melt the cheese. We baked ours for about another 8 minutes.
Ta da! (Sorry my photos seem so red and yellow -- terrible light in my kitchen, and we took these at night.)
Since this little recipe post turned out to be longer than expected, perhaps I'll save the red velvet cupcake recipe for a later post this week. In the meantime, if you decide to try a handmade pizza, let me know how it works out! What would your special toppings be? Nate and I are fancy pizza people -- we do like to experiment with our toppings, and we also like the addition of a sweet ingredient, like dates or pineapple or pear. What about you? Prosciutto or plain pepperoni?


 tamar's flickr favorites: nest, pretty things


 5. Bake at 350° for 30-35 minutes. Cool completely before icing.
 For the icing:
  5. Add 2½ tsp. vanilla and beat well again.
 6. Ice the cooled cake and enjoy!
 Red cake, as it's affectionately called in my family, is my very favorite Grammy dessert. It would even edge out her marvelous chocolate cream pie if I had to make a choice. It's what I've always requested ever since I was little for my birthday celebration, but usually, I only take home what's left after everyone else gets a piece too -- a quarter of a cake or so. But this time, Nate and I had 12 whole mini-cakes, essentially an entire red velvet cake, to ourselves. And one week later, I have 3 extra pounds to show for it. But boy was it worth it. You can diet anytime, but red cake makes any day a very special day.


 So when the bride initially told me about the feel and colors for her wedding, we did some collaborative thinking, and decided that her six bridesmaids would receive personalized pieces that fit each girl's style and personality. (That's the best way to do it, in my opinion: it becomes a part of your gift to them and a way to honor them for being part of your life.) We also decided that three colors in the jewelry pieces might get too busy, so I stuck with aqua and grey, with a flower theme to tie in with the flower embellishments on the dress. Here's what I came up with: six coordinating sets of necklace and earrings.


 It does feel good to be finished with so large a project, but I have to admit that I'll be sad when these pretty colors leave my house to be shipped off to the bride. {Sigh.} Anyway, if you are or know a bride who's looking to do custom pieces for herself, her bridesmaids, mothers or hostesses, feel free to send me an email, and we'll chat.


 Hope your day is bright and cheery. Pics of our glorious Valentine's Day Feast coming tomorrow!

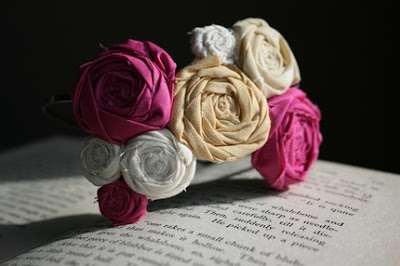
 (Although, 3. I still love getting beautiful flowers. Like these. But never, in any case, the dreaded and prosaic red rose dozen. It's just old and tired, fellas, and those flowers have been sitting in freezers for three weeks: they aren't going to last another four days. Go with a lovely mix, or a simple hand-tied bunch of